
Once you’ve downloaded the Jukebox SDK, using the instructions here, you can see a fully working integration of Jukebox by adding our demo scene to a Unity project as follows:
- Copy the appropriate jukebox.dll assembly into your Unity game project:
- Create a directory in your Unity game project under the Assets directory, called ‘plugins‘, so that your projects directory structure contains the path:
<your_project>/Assets/plugins/ - Locate the plug-in DLL within the SDK from either unity/plugins/windows/jukebox.dll or unity/plugins/mac/jukebox.dll, depending upon whether you’re developing for windows or for mono-based platforms.
- Copy the appropriate jukebox.dll under your newly created (or pre-existing) plugins directory.
- Create a directory in your Unity game project under the Assets directory, called ‘plugins‘, so that your projects directory structure contains the path:
- Import the plug-in wrapper scripts into your project as follows* (see below for alternative):
- Using the Unity development environment menu select Assets->Import Package->Custom Package and locate the file unity/demo_code/full_example_app.unitypackage from the SDK bundle.
- When prompted, ensure all items are selected and click ‘Import’.
- This will have imported three scripts in your Unity project’s Assets/Scripts folder, which are as follows:
- JukeboxPlaylist: this is a wrapper around the Jukebox Playlist interface, used for connecting the playlists you’ve defined on the Jukebox web-site to AudioSource objects within your game
- JukeboxControl: this is a wrapper around the top-level Jukebox control, used for switching between playlists.
- MusicControl: a script illustrating how to switch between playlists in response to in-game triggers.
- This will also have imported a scene, called ‘SoundTest’ into your project. Using the Unity development environment menu switch to this scene by selecting File->Open Scene, locating the file SoundTest.unity in the file dialog, and clicking Open.
The scene is a simple scene consisting of a box, surrounded by a pink trigger area that causes the audio to be switched to a different playlist when the player is standing in the trigger area. If you start the scene playing you should notice several things:
- A couple of seconds after pressing play audio starts playing.
- When audio starts playing, there is a red text overlay giving details of the track, as well as track progress as a percentage.
- Pressing the ‘enter’ button on your numeric keypad skips to the next track in the playlist.
- Walking into the pink trigger zone causes the audio to change to a different playlist.
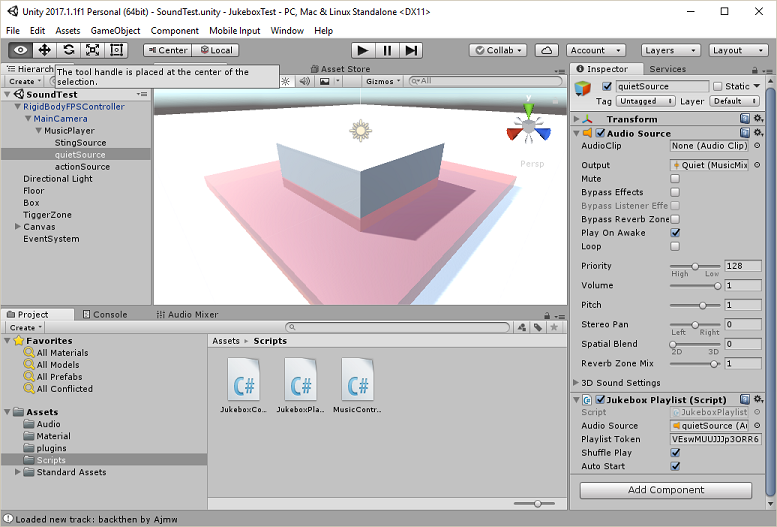
Key things to notice about this scene are as follows:
- The top level RigidBodyFPSController component has a component called Jukebox Control. This has a property called ‘Display Text’ that tells it to display information about the currently playing track on the specified Text object. For more information on this see here.
- RigidBodyFPSController also has two nested components under MainCamera->MusicPlayer called quietSource and actionSource. These are both Jukebox Playlist script components, and connect the Unity Audio Source specified by the ‘Audio Source’ property with the pre-defined playlist specified by the ‘Playlist Token’ property. For more information on this, see here.
Now that you have seen Jukebox working in a test scene, you can integrate the Jukebox plug-in and scripts with your game project following the instructions here.